

My journey to the perfect breakfast wasn't always smooth, hon. I was tired of bland, rubbery protein pancakes, yearning for something with actual texture. One dreary Monday, after a particularly disappointing batch, I stared at my waffle iron, a lightbulb moment! What if I tweaked my usual protein mix for waffles? A few messy experiments later, and bam! I hit gold. That day, my life changed forever, and these Crispy protein Waffles became my go-to.
Oh, the first time I tried to make these! I was so excited, I poured way too much batter into the waffle iron. It oozed out everywhere, sizzling and smoking, coating my counter in a sticky, protein-powder-y mess. My kitchen looked like a science experiment gone wrong! I just stood there, spatula in hand, laughing. Lesson learned: less is more when making these beautiful waffles.
Ingredients for Crispy Protein Waffles You'll Need
- 1.25 cups unflavored or vanilla protein powder (whey or plant-based): This is where the magic happens, my friend! I’ve tried so many protein powders, and honestly, the brand really matters here. For the best Crispy protein Waffles, a good quality whey or a smooth plant-based blend (pea protein is my favorite for texture) is key. It's not just for the protein, it actually helps with the structure and browning. Vanilla adds a lovely warmth, but unflavored lets you play with toppings more. Don't skimp on this one!
- 1 cup all-purpose flour: Now, I know some folks try to go all-protein, but a little bit of AP flour is what gives these waffles their backbone and that gorgeous, tender crumb. It balances out the protein powder, preventing them from becoming too dense or gummy. Think of it as the friendly neighbor who keeps everything cohesive. Don't worry, we're still getting tons of protein, but this little bit of flour ensures they hold together beautifully and get that perfect crisp.
- 2 tsp baking powder: This is our fluffy secret weapon! Without baking powder, you'd have flat, sad little discs, not the glorious, airy waffles we're aiming for. It reacts with the liquids, creating those wonderful pockets of air that give the waffles their light interior and help them puff up against the iron for that crisp exterior. Always check your baking powder's expiry date, an old one means flat waffles, and nobody wants that!
- 1 tbsp apple cider vinegar: Okay, hear me out ACV in waffles sounds weird, right? But it's a game-changer! When mixed with milk, it creates a buttermilk substitute, which reacts with the baking powder for extra lift and tenderness. Plus, it gives a subtle tang that brightens the whole flavor profile. You won't taste vinegar, I promise! It's just there to make your Crispy protein Waffles sing.
- 1/4 cup neutral oil (such as avocado or melted coconut oil): Fat equals flavor and, more importantly for waffles, crispiness! This oil is crucial for achieving that golden-brown, shatteringly crisp exterior we all dream of. Avocado oil is my go-to for its mild flavor and high smoke point, but melted coconut oil works beautifully too, adding a hint of tropical sweetness. It also keeps the waffles from sticking to the iron, which is a huge bonus, honestly.
- 2 tbsp erythritol or preferred granulated sweetener: For a touch of sweetness without a sugar crash! Erythritol is my favorite because it bakes well and doesn't have a weird aftertaste, but you can use any granulated sweetener you like. It helps with browning and just makes the waffles feel like a treat. If your protein powder is already super sweet, you might even reduce this a bit. Taste the batter (before eggs!) and adjust.
How to Cook Up Crispy Protein Waffles, Step by Step
- Step 1: Preheat Waffle Iron:
- This step is non-negotiable, my friend! You want that iron screaming hot, ready to embrace your batter with open arms. I usually plug mine in right when I start gathering ingredients. Listen for that little beep or watch for the light to turn green. A properly preheated iron is the secret to those beautiful golden-brown edges and ensures your Crispy protein Waffles don't stick. Seriously, don't rush this part, it makes all the difference!
- Step 2: Combine Dry Ingredients:
- Grab a large bowl and your whisk! Toss in the protein powder, flour, baking powder, salt, and cinnamon. Give it a really good whisk until there are no clumps and everything is evenly distributed. This aeration step isn't just about mixing, it helps ensure your leavening agents are spread out, so every bite of your Crispy protein Waffles is light and fluffy. Don't be shy with that whisk!
- Step 3: Mix Wet Ingredients:
- In a separate, medium-sized bowl, crack those eggs, pour in the milk, apple cider vinegar, oil, and sweetener. Whisk 'em all together until it's a smooth, pale yellow concoction. The apple cider vinegar will start to curdle the milk a bit, which is exactly what we want that's our homemade buttermilk working its magic for extra tender waffles. This liquid base is gonna hydrate all that protein powder and flour so beautifully.
- Step 4: Combine Batter Gently:
- Now for the big moment! Pour your wet ingredients into the bowl with the dry. Stir gently with a spatula or wooden spoon until just combined. A few small lumps are totally fine, even desirable! Overmixing is the enemy of fluffy waffles, it develops the gluten too much, leading to tough waffles. We're aiming for light and airy, remember? This gentle touch is key for the texture of your Crispy protein Waffles.
- Step 5: Rest the Batter:
- Patience, my friend, is a virtue here! Cover the bowl and let that beautiful batter rest for at least 5-10 minutes, or even up to 20. This allows the flour to fully hydrate, the protein powder to bloom, and the baking powder to start its work. It makes for a much more tender and consistent waffle. Honestly, I didn't expect that this step would make such a difference, but it really does for the perfect Crispy protein Waffles.
- Step 6: Cook Waffles:
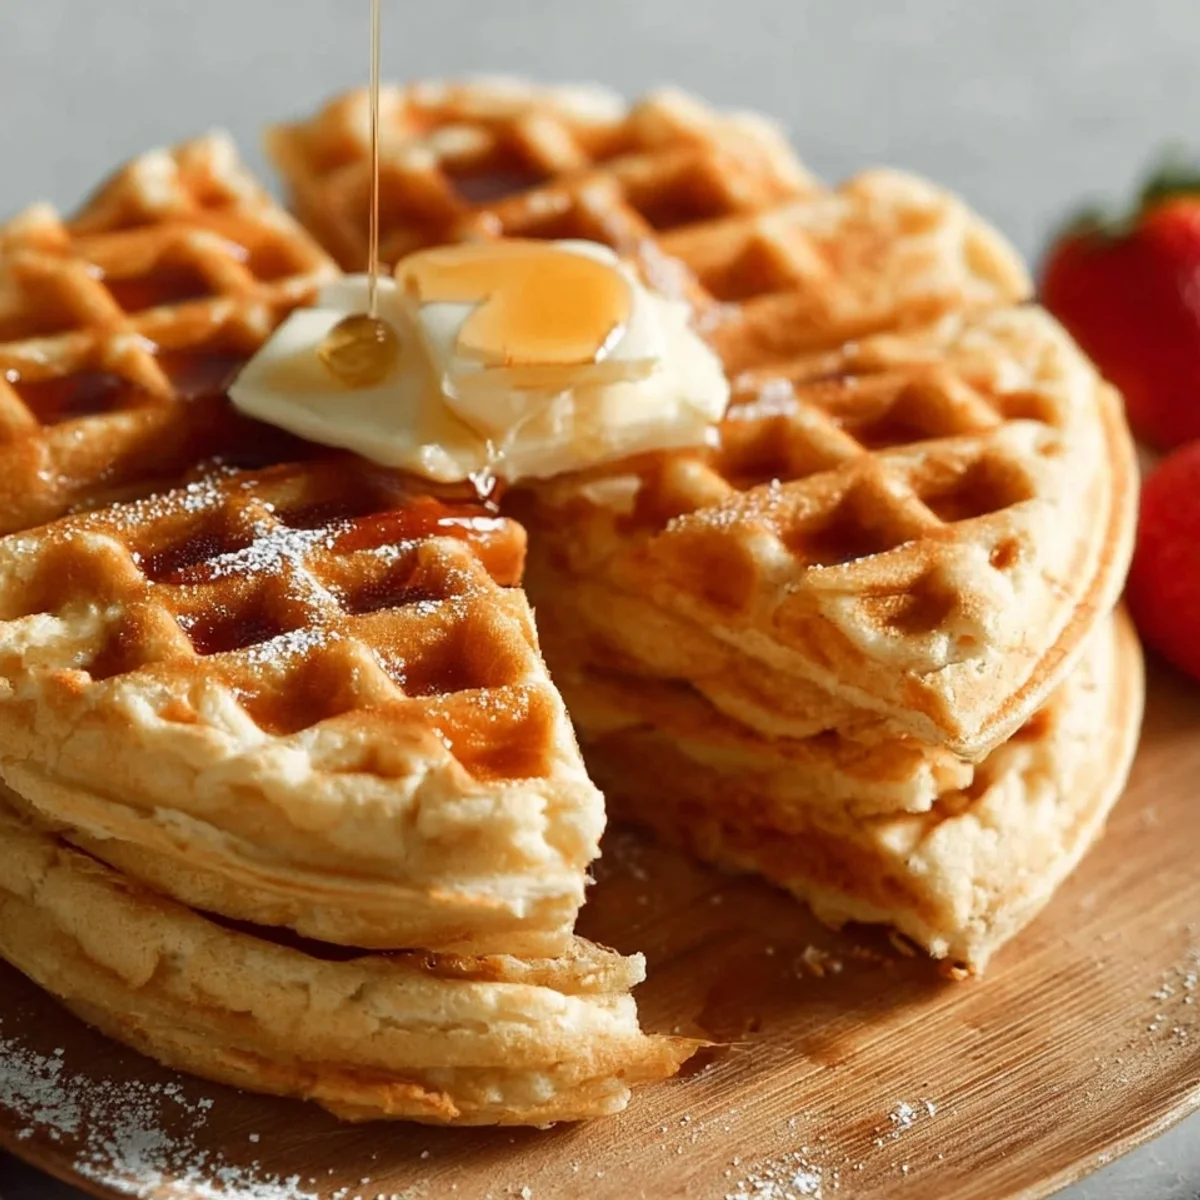
- Lightly grease your hot waffle iron if needed, then pour in about 1/2 to 3/4 cup of batter per waffle, depending on your iron size. Close it up and let it cook until golden brown and steaming stops, usually 4-6 minutes. Resist the urge to peek too early! When they're done, they'll lift easily and be wonderfully crisp on the outside. That golden hue and the sound of the steam escaping? Pure waffle perfection!
There's something so comforting about the smell of these waffles cooking. The house fills with cinnamon and vanilla, and that sizzling sound from the iron just gets me every time. It's a little ritual, honestly. Watching them puff up and turn golden, knowing I'm about to bite into something so satisfying and good for me? Pure joy, every single time.
Keeping Your Crispy Protein Waffles Fresh: Storage Secrets
Got leftovers? Lucky you! These Crispy Protein Waffles actually freeze beautifully. Once they've cooled completely (and I mean completely, or they'll get soggy!), stack them with parchment paper in between, then pop them into an airtight freezer bag or container. They'll keep for up to 2-3 months. To reheat, just pop them straight into a toaster or toaster oven until they're golden and crisp again. I once froze them warm and ended up with a sad, sticky block oops! Learn from my mistakes, friend.

Swapping Ingredients for Your Crispy Protein Waffles
I've played around with so many swaps for these waffles! For the flour, I've had decent luck with a 1:1 gluten-free blend, though the texture is a smidge softer. Oat flour can work too, but you might need a tiny splash more milk. If you're out of apple cider vinegar, lemon juice is a good acidic stand-in. As for sweeteners, maple syrup or honey can be used, but reduce the milk slightly since they add liquid. Just remember, each swap changes the final texture a bit, but hey, that's part of the fun of experimenting!
Serving Up Your Crispy Protein Waffles with Pizzazz
Oh, the possibilities are endless for serving up these glorious waffles! My absolute favorite is a dollop of Greek yogurt (more protein, yay!), a handful of fresh berries, and a drizzle of sugar-free maple syrup. But don't stop there! Try them savory with a fried egg and a sprinkle of everything bagel seasoning. Or get wild with some melted peanut butter and banana slices. For a real treat, a scoop of protein ice cream on top is divine. However you serve them, these waffles are a canvas for your breakfast dreams!
The Sweet Story Behind Crispy Protein Waffles
Waffles, in their earliest forms, have been around since ancient Greece, believe it or not! Those first "obelios" were flat cakes cooked between hot metal plates. Fast forward through medieval Europe, and we see the development of the characteristic grid pattern. The modern American waffle, often associated with breakfast and brunch, really took off with the invention of the electric waffle iron. My personal connection? It's about bringing that comforting, classic breakfast experience into my high-protein lifestyle, making old traditions new again with a healthy twist.
So there you have it, my friend! My absolute favorite recipe for Crispy Protein Waffles. They've saved my mornings countless times and I just know they'll do the same for you. Don't be afraid to make them your own! I'd love to hear how you enjoy them, what toppings you choose, or any fun twists you add. Drop a comment below and let's chat waffles!

FAQs About Making Crispy Protein Waffles
- Can I make the batter ahead of time?
You totally can! I often mix the dry ingredients the night before. For the wet, I'd say mix them just before cooking for the best rise. If you combine everything, the baking powder might lose some oomph, but it'll still work in a pinch. Just give it a gentle stir before cooking!
- My waffles aren't crispy, what went wrong?
Oh no! A few culprits: your waffle iron might not be hot enough, or you might be opening it too early. Also, make sure you're using enough oil in the batter and greasing the iron. Sometimes, resting the batter helps too. Keep practicing, you'll get those perfect Crispy Protein Waffles!
- Can I use different types of milk?
Yep! I've used everything from almond milk to soy milk to regular dairy milk. Unsweetened vanilla almond milk is my usual go-to. Just make sure it's unsweetened if you're controlling the sugar, or adjust your sweetener in the recipe. They all work beautifully for these waffles.
- How do I know when the waffles are done?
Your waffle iron will often have a light that indicates 'ready,' but I also listen. When the steam coming out of the sides significantly reduces, and they look golden brown and easily lift from the iron without sticking, they're good to go! Don't be afraid to let them get nice and dark for extra crispiness.
- Can I make these without a waffle iron?
Well, then they wouldn't really be waffles, would they? But you could totally turn this into a pancake batter! Just thin it out with a little extra milk until it's pourable for pancakes. They won't have that iconic crisp texture, but they'll still be delicious and packed with protein. Give it a try!