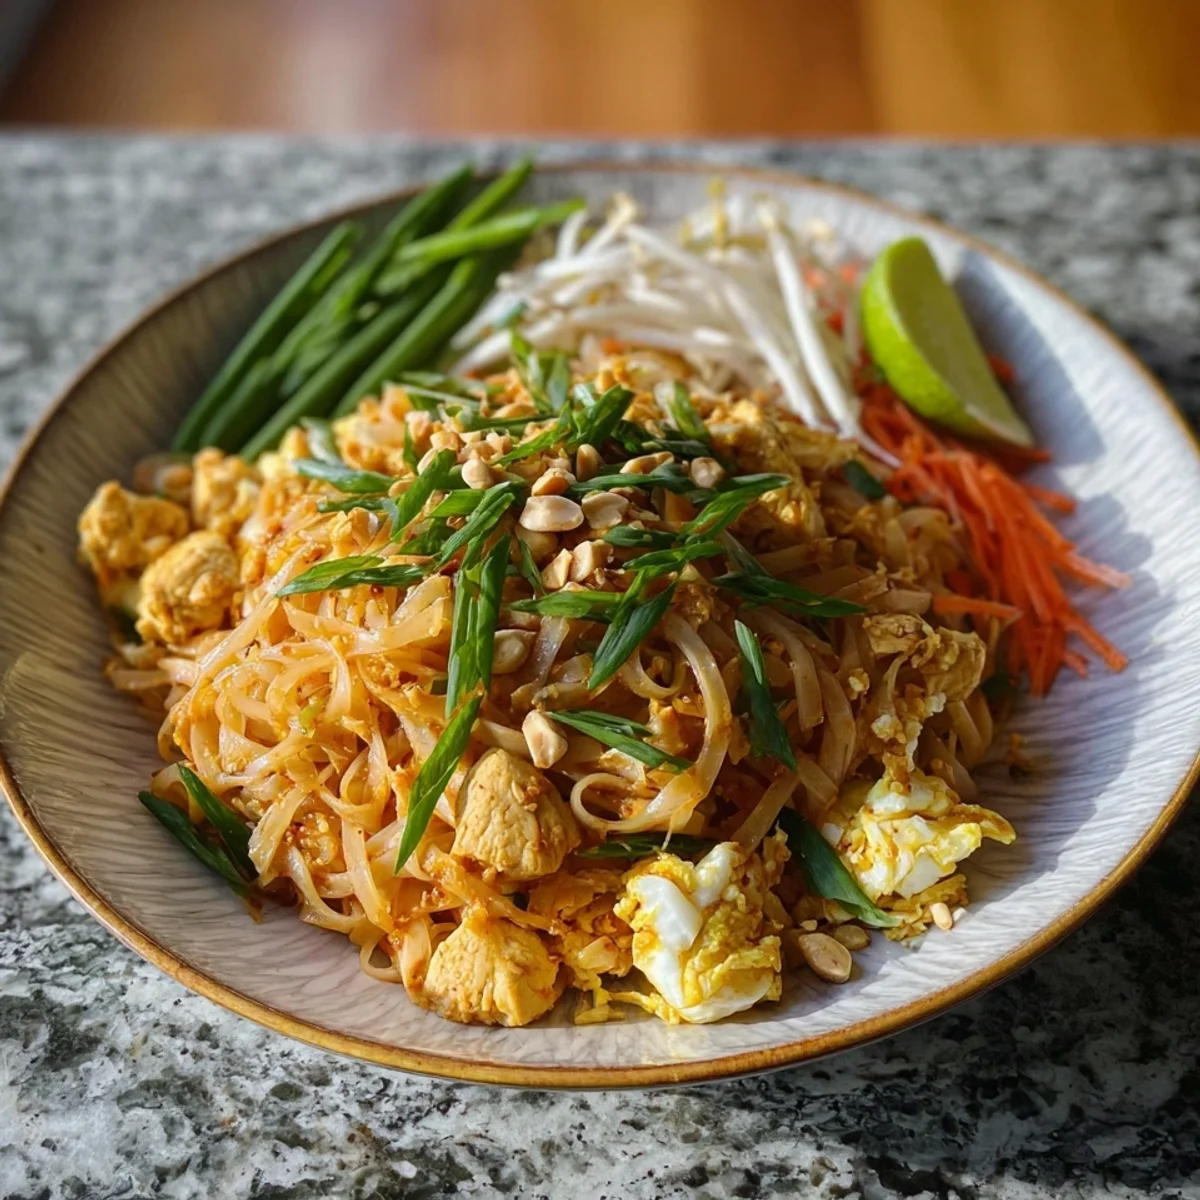


Oh, hey friend! Grab a seat, because I'm about to spill the beans on my ultimate weeknight hero: Quick chicken Pad Thai. I first stumbled upon this recipe during a frantic Tuesday night, craving something takeout-worthy but without the delivery wait. Honestly, I didn't expect that it would become my go-to, but one bite of those saucy noodles and tender chicken, and I was hooked. It's a game-changer, promise!
Okay, so my first attempt at chicken Pad Thai? Total noodle disaster. I didn't soak them long enough, and they were crunchy! I had this vision of perfectly chewy strands, and instead, I had... al dente, but like, really al dente. My husband was a good sport, bless his heart, but we ended up just laughing and ordering pizza. Live and learn, right?
The Essential Ingredients for Your Best Chicken Pad Thai
- 1 lb boneless, skinless chicken breast, thinly sliced: Our star protein! Thinly slicing the chicken is key here, hon. It means it cooks up super fast, which is crucial for a 'quick' anything, especially our chicken Pad Thai. Plus, those thin pieces soak up all that amazing sauce so much better, giving you flavor in every single bite. Don't skimp on this prep step!
- 8 oz flat rice noodles (Pad Thai style): These are the backbone, honestly. For a proper chicken Pad Thai, you need those wide, chewy beauties. They're like little flavor sponges, soaking up all the goodness from the sauce. Getting them just right soaked, not boiled is probably the most important part. Trust me, it makes all the difference in the final texture.
- 3 tbsp tamarind paste (unsweetened concentrate): This little jar is pure magic, trust me. It gives that signature sweet-sour tang that you expect from an authentic chicken Pad Thai. Don't skip it! It's what differentiates a good Pad Thai from a 'wow, this is amazing' Pad Thai. It's concentrated, so a little goes a long way to build that complex flavor profile.
- 3 tbsp fish sauce: Don't be scared of the smell, hon! Seriously, just embrace it. This is the umami bomb in our sauce, providing that incredible savory depth. It's essential for balancing the sweetness and sourness. Without fish sauce, your chicken Pad Thai just won't have that authentic, irresistible punch. It's a must-have!
- 2 tbsp packed light brown sugar: Sweetness is key to balance everything out. Brown sugar adds a deeper, more caramel-like note than white sugar, which I think works beautifully with the other strong flavors. It's not just about making it sweet, it's about creating harmony in the sauce. A little bit of this makes our chicken Pad Thai sing!
- 2 large eggs: Eggs add such a lovely richness and texture to the dish. They're like little fluffy clouds, absorbing the sauce and adding another layer of protein. Plus, they cook up so fast! I love how they break up into little pieces and get woven throughout the noodles. They just belong in chicken Pad Thai, you know?
Mastering the Steps to a Perfect Chicken Pad Thai
- Step 1: Prep Noodles & Sauce:
- First things first, get those noodles soaking in hot water. Not boiling, just hot! While they're chilling, whisk up that incredible sauce for our chicken Pad Thai. This is where all the magic starts to happen, combining the tamarind, fish sauce, brown sugar, lime, and sriracha. Taste it! Adjust it! Make it yours. It should be a beautiful balance of sweet, sour, and salty. Trust your palate here, it's your kitchen after all.
- Step 2: Cook chicken:
- Next up, get that chicken golden in your wok or largest skillet. Thin slices mean quick cooking, which is exactly what we want for a speedy chicken Pad Thai. Season it simply with salt and pepper, then sear it well until it's browned and cooked through. Don't overcrowd the pan, or it'll steam instead of sear. Once it's done, scoop it out and set it aside. We'll bring it back later!
- Step 3: Scramble Eggs:
- Eggs next, quick scramble! Add a tiny bit more oil if needed, then pour in your beaten eggs. Swirl them around for just a minute or two until they're softly scrambled. Break them into smaller pieces with your spatula. They add such a lovely texture to the finished chicken Pad Thai, totally worth the extra step for that fluffy goodness. Set these aside with the chicken.
- Step 4: Sauté Aromatics:
- Now for the good stuff garlic and maybe some shallots if you're feeling fancy! This step builds the flavor foundation for our amazing chicken Pad Thai. Sauté them until fragrant, about 30 seconds. Don't let them burn, or they'll get bitter. That beautiful aroma filling your kitchen? That's the promise of deliciousness to come, friend.
- Step 5: Combine Noodles & Sauce:
- Time to bring in the noodles and that glorious sauce! Drain your soaked noodles well, then add them to the pan with your aromatics. Pour over your prepared Pad Thai sauce. Toss it all together quickly, using tongs, making sure every strand of noodle is coated in that luscious, sticky goodness. This is where your chicken Pad Thai really starts to look like the dish you know and love.
- Step 6: Add Proteins & Veggies:
- Finally, fold in your cooked chicken and eggs. If you're adding bean sprouts, chives, or any other quick-cooking veggies, now's the time. Gently mix everything until it’s heated through and evenly distributed. Don't overmix or your noodles might break up too much. This is the grand finale, where all the elements of your delicious chicken Pad Thai come together in harmony.
Cooking this chicken Pad Thai is such a joyful, almost meditative experience for me now. After making it countless times, the chopping, the whisking, the sizzling it all just flows. There’s something incredibly satisfying about watching all those vibrant ingredients come together in a symphony of flavors and textures. Honestly, it always puts a smile on my face, even on the busiest nights.
Storing Your Leftover Chicken Pad Thai Like a Pro
Got leftovers? Score! This Chicken Pad Thai actually tastes pretty great the next day, sometimes even better! Just pop any cooled portions into an airtight container and stash them in the fridge. They'll keep happy for up to 3 days. To reheat, I usually go for the microwave on a medium setting, stirring every minute or so until it's warmed through. My biggest mistake? Trying to freeze it. Oops. The noodles get super mushy and the texture just isn't the same, so I wouldn't recommend it. Stick to the fridge, friend, and enjoy that deliciousness for a few days!

Playing with Flavors: Substitutions for Chicken Pad Thai
I've played around with this recipe so much, you wouldn't believe it! If chicken isn't your thing, shrimp or even firm tofu (pressed and cubed!) work beautifully in this Chicken Pad Thai. For the veggies, I've tossed in bell peppers, shredded carrots, or even some thinly sliced cabbage when I'm out of bean sprouts. Ran out of tamarind paste once and used a combo of rice vinegar and a pinch more brown sugar it wasn't exactly the same, but it worked in a pinch! Don't have lime? Lemon juice will do, just start with less and taste. The beauty of Chicken Pad Thai is its flexibility!
What to Serve Alongside Your Quick Chicken Pad Thai
This Quick Chicken Pad Thai is a meal in itself, honestly. But if you're feeling a little extra, or just want to make it a spread, I've got ideas! A simple side of crisp cucumber slices with a sprinkle of chili flakes provides a lovely cool contrast. For something green, a quick sauté of bok choy with a splash of soy sauce is perfect. And to really elevate it, a sprinkle of crushed peanuts and a wedge of fresh lime are non-negotiable for me. Oh, and a cold Thai iced tea? Pure bliss. It just makes the whole Chicken Pad Thai experience sing!
The Roots of Flavor: A Little History of Chicken Pad Thai
Pad Thai, in general, has such a cool history! It's not as ancient as some Thai dishes, it actually became popular in the mid-20th century as part of a nationalistic campaign to promote Thai identity and agriculture. The government encouraged people to eat noodles made from rice, which was abundant. My connection? Learning this made me appreciate every bite of my homemade Chicken Pad Thai even more. It's not just food, it's a piece of history, a symbol of national pride, and now, a beloved weeknight meal in my own kitchen. Pretty neat, right?
And there you have it, friends! My absolute favorite Quick Chicken Pad Thai recipe. It's a dish that never fails to bring comfort and a little bit of culinary adventure to my kitchen. I hope you give it a try and fall in love with it just as much as I have. Don't forget to tag me if you make it, and tell me all about your Chicken Pad Thai journey in the comments below! Happy cooking, my dears!

Your Burning Questions About Chicken Pad Thai, Answered!
- → Can I make Chicken Pad Thai vegetarian?
Absolutely! Skip the chicken and fish sauce. Use pressed, firm tofu instead of chicken, and a vegetarian fish sauce alternative or extra soy sauce for umami. It'll still be super flavorful, I promise! I've done it myself, and it's a fantastic option.
- → What if I can't find tamarind paste?
Tamarind paste gives that unique tang, but if you're in a bind, you can try a mix of rice vinegar and a little extra lime juice, plus a touch more brown sugar to balance. It won't be quite the same, but it'll get you pretty close to the signature Chicken Pad Thai flavor.
- → My noodles are sticking together, what did I do wrong?
This happens! Make sure you're using enough oil in the pan, and don't overcrowd it. Also, rinse your noodles in cold water after soaking to remove excess starch. Tossing them quickly and vigorously with tongs helps too. You'll get it next time, practice makes perfect Chicken Pad Thai!
- → How spicy is this Chicken Pad Thai recipe?
It's totally up to you! I've included 1 tsp of sriracha as optional, which gives a mild, pleasant warmth. If you love heat, add more! If you're sensitive, leave it out or add just a tiny dash. You're the boss of your Chicken Pad Thai spice level.
- → Can I add other vegetables to my Chicken Pad Thai?
Oh, for sure! I often toss in some shredded carrots, thinly sliced bell peppers, or even a handful of spinach at the end. Just make sure they're thinly sliced so they cook quickly and don't make the dish watery. It's a great way to use up whatever's in your fridge!